How to create a continued header for a Custom Audit Report
By default, the custom Audit Report does not include Header 12 (which is the continued header).
In order to bring this through, the first step is to create it within the custom Audit Report document - located within the Custom folder C:\Program Files (x86)\CaseWare\Resources\Knowledge Library\Custom
For guidance on creating a custom Audit Report, click here.
Follow these steps to create the header:
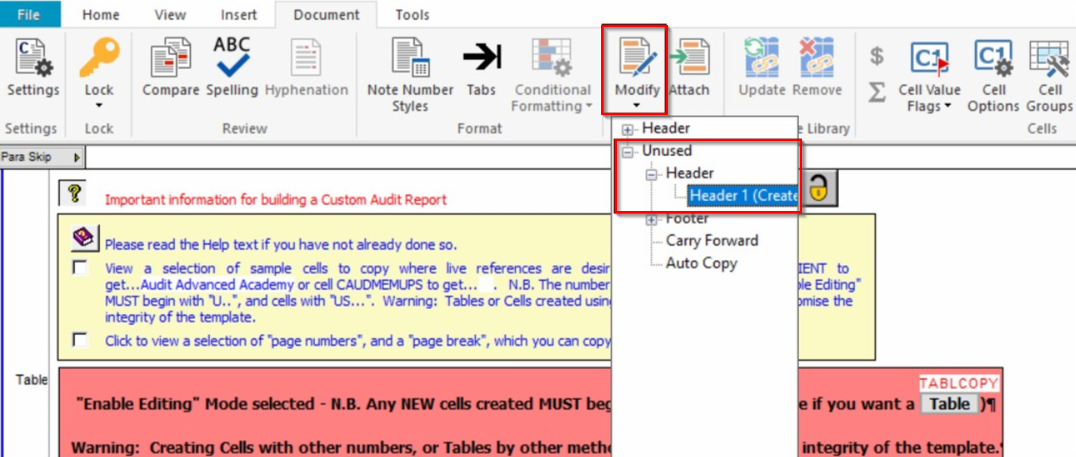
1. Open the Audit Report, navigate to the Document tab, select Modify and then select to create a new header as shown below.
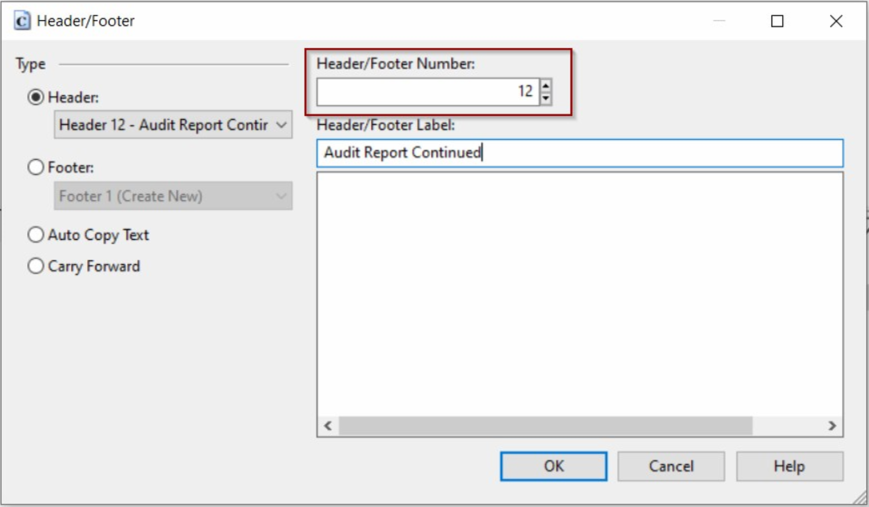
2. Within this window, set the Header/Footer Number to 12 and give the header an appropriate name.
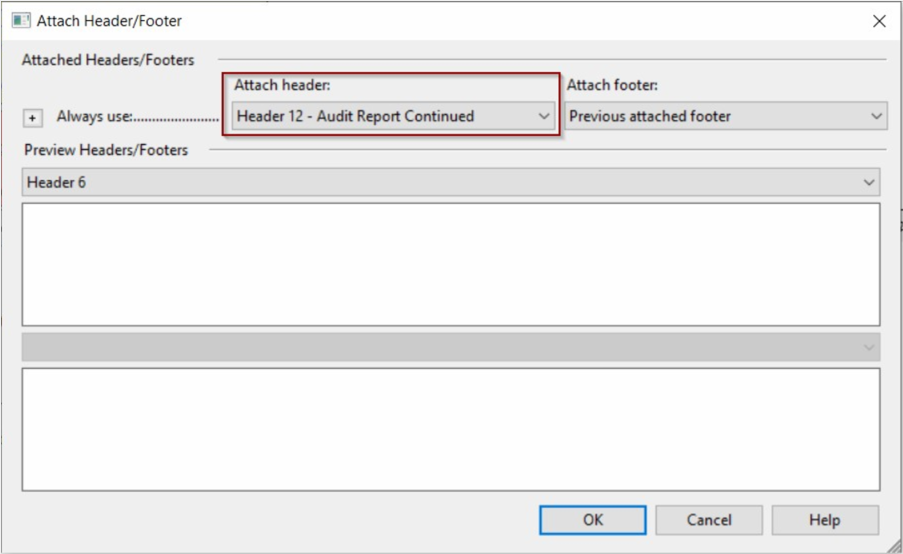
3. Although the header will appear blank, it will now be ready to attach. Ensure that the cursor is placed on the section that requires the header to be included and then use the Attach tool.

4. Within this window, select the created header from, the dropdown, and press OK to attach the header.
5. Once this has been attached, save and close the custom audit report and reload this back in the accounts. The Continued header will now pull through.
- Related template: AccountsAdv IFRS, Charity/Academy, FRS101/102/105 LLP
- Software platform: Working Papers 2021, Working Papers 2022