How to set a custom font in Caseware
1. Find the font you require from within the control panel under Control Panel\Appearance and Personalisation\Fonts.

2. Right click and select preview on the font. The font must be listed as a TrueType for this to work.
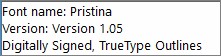
3. Copy the font name exactly as it is set on the top line.
4. In Caseware Working Papers, access the Digital Dashboard, hover over the Other Docs option and choose Computer Settings.

5. Select the Font Tab, in one of the Font Boxes Paste the copied font name.

6. You can use the sample drop down to make sure your font appears.

7. In the accounts you can now select global font and then select your custom font in order to apply this across the accounts as a standard.

Distributing
To distribute the new custom font to other users, browse to the below Caseware installation path (CaseWare/Resources/Databases) and copy the highlighted files (CDB1, CDB1.DBF and CDB1.FPT).
Paste the three files into the same installation path on the other user’s machine.

- Related template: None
- Software platform: Working Papers 2018, Working Papers 2019, Working Papers 2020, Working Papers 2021, Working Papers 2022