Inserting cells into custom tables
1. Click into the area of the table that is required and select the C1 icon shown below from the toolbar.

2. Name the cell on the pop-up window.
3. If the cell number window displays a tick in the Table Cell then the cell number can be used.
If it is not ticked, then the cell number will default to C1.

4. Once you have named the cell, the cell properties screen will be displayed.
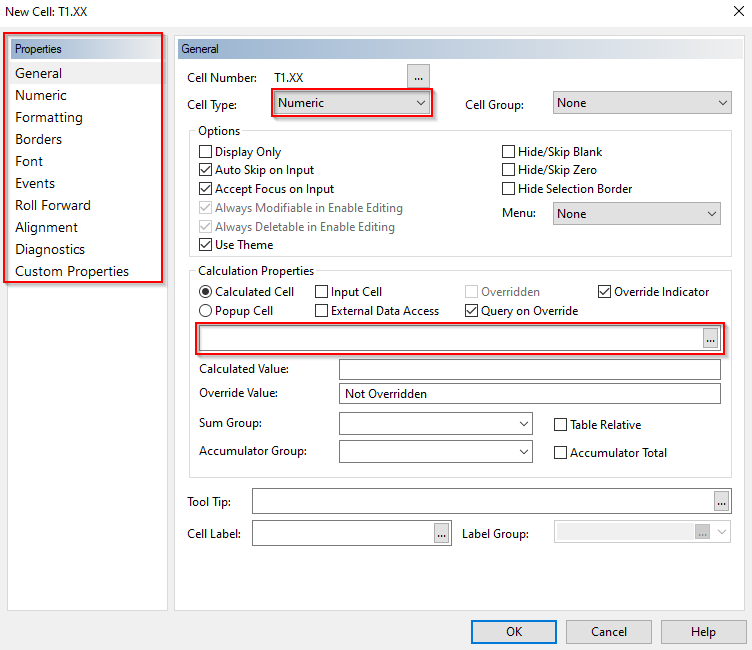
The above window allows users to do the following:
- Set the cell type to the following:
Numeric: Accepts any numeric value
Alphanumeric: Accepts both numeric and text
Date: Returns cell values to a date
Check Box: Can only be selected or deselected. Check box cells prompt users in the Form Mode to provide a Yes or No response and are useful in controlling printing options.
Radio Button: Prompts users in the Form Mode to provide a Yes or No response by activating one radio button or another. A minimum of two radio buttons must be created in order for this either/or process to function.
- Access specific properties relating to the cell type selected
- Mark the cell as an input cell to allow users to enter information in Form Mode
- Enter a calculation in the formula bar for automated cells.
The cell properties can be accessed or changed at any stage by double clicking on the cell. Repeat the process of creating cells for the remaining sections of the table.
For further customisation of custom tables, please see the following articles:
Creating tables in Caseware here
Inserting rows and columns into custom tables here
Editing cells and block cell edits here
Using formulas in custom tables here
Cell linkage to mapping numbers here
- Related template: AccountsAdv IFRS, Charity/Academy, FRS101/102/105 LLP
- Software platform: Working Papers 2018, Working Papers 2019, Working Papers 2020, Working Papers 2021